In this article, I am going to show you how to create a YouTube channel and also how to set up a YouTube channel to optimize it for traffic. I am going to take you through the steps and highlight some of the difficulties, so you don’t make similar mistakes.
Why YouTube?
YouTube has been around for several years now. The first YouTube video was made in San Diego Zoo in 2005, by one of YouTube’s founders Jawed Karim.
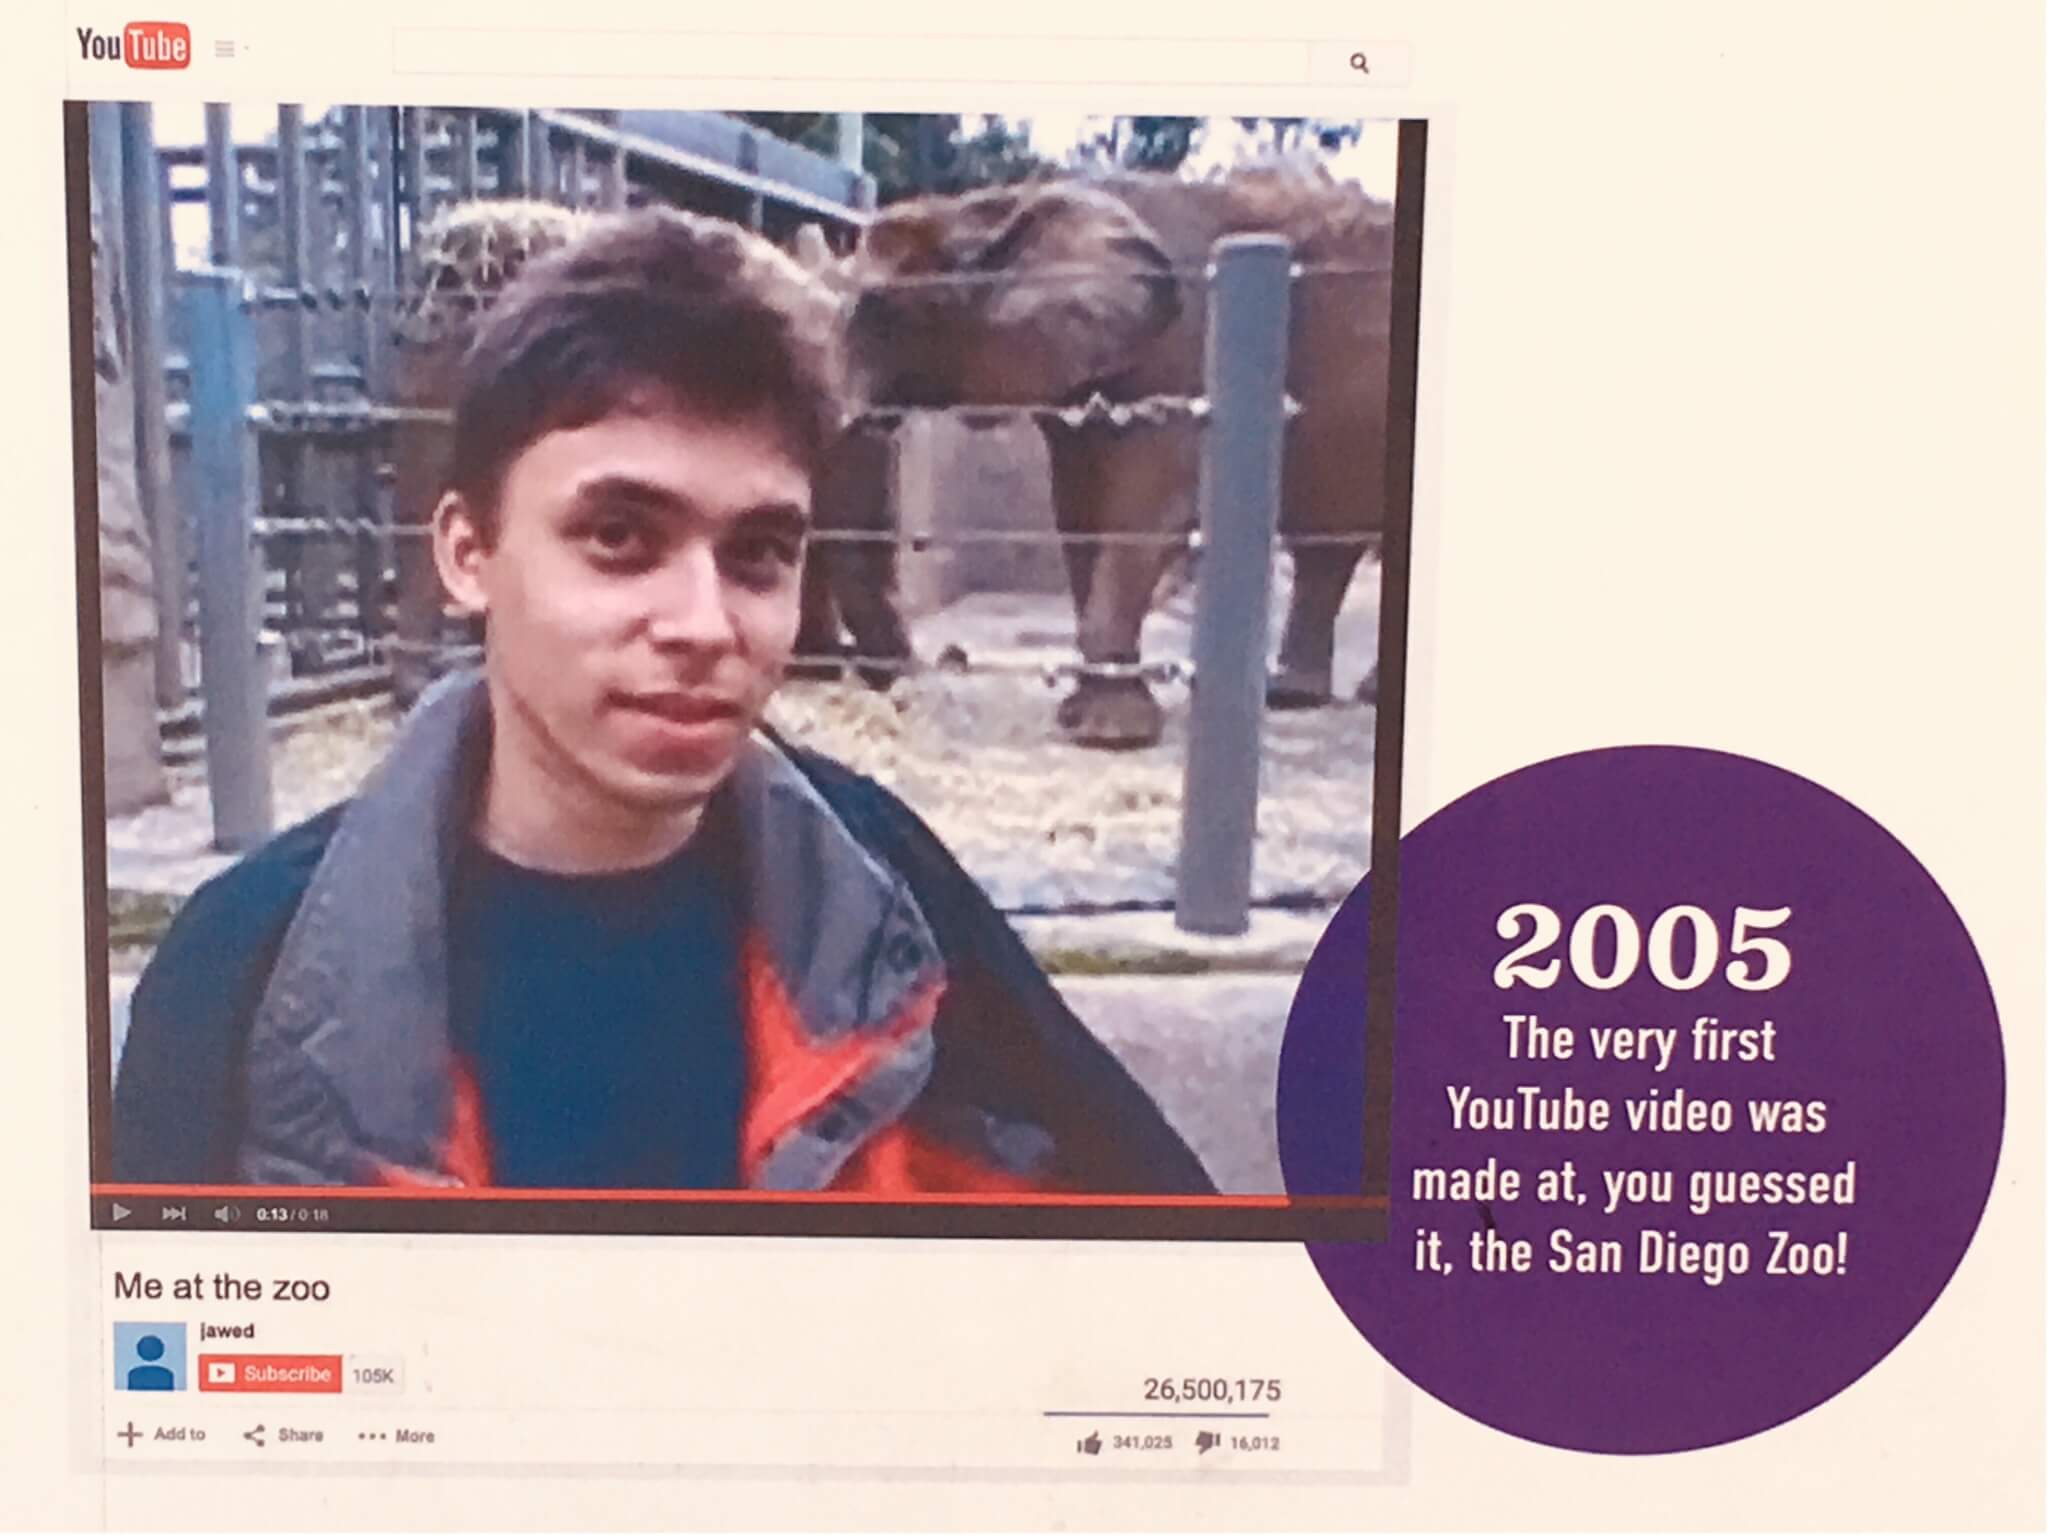 First YouTube Video San Diego
Since then, YouTube has become part of the Google (Alphabet) empire and progressed to be the second biggest search engine on the Internet.
Now, video content accounts for over 74% of all online traffic and over five billion YouTube videos are watched every single day.
If you are looking to market a product or service, or maybe even yourself, YouTube has to be taken seriously and one of the first things you need to do is learn how to create a YouTube channel.
So how do you create a YouTube Channel? This article will show you step-by-step, how to do it.
If you already have a YouTube channel and want to know how to earn an income from it, please download my FREE GUIDE which will show you a series of sales funnels that you can use to earn an income from YouTube.
How To Create a YouTube Channel
Let’s start with your Google account. You need a Google account before you can create a YouTube Channel. If you already have one, move to the next section.
How To Create a YouTube Channel If You Don’t Have a Google Account
If you don’t already have a Google account set up, you’ll need to create one before you get started on YouTube.
Note that these instructions apply to a desktop. I wouldn’t recommend setting up your YouTube channel on a mobile platform as some of the editing features aren’t available.
To set up your Google account, simply follow the below steps:
First, go to https://accounts.google.com/signup. Here you will see this form:
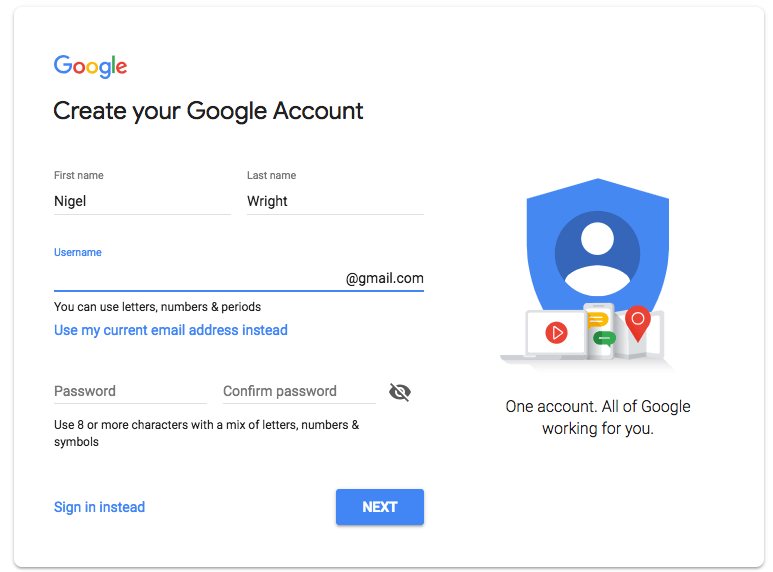
Enter your First and Last Name and an email address for your Google Account. This will also be your Gmail address going forward.
Choose something that works for you and/or your brand, but bear in mind that if you want your name, chances are you will need to add a number on the end unless you have a unique name.
Once you have chosen a username/Gmail address and password, click “Next” and you will be asked to provide a phone number. I recommend you use a mobile number here as Google will send you a text to verify it is your correct number.

Click “Next” again
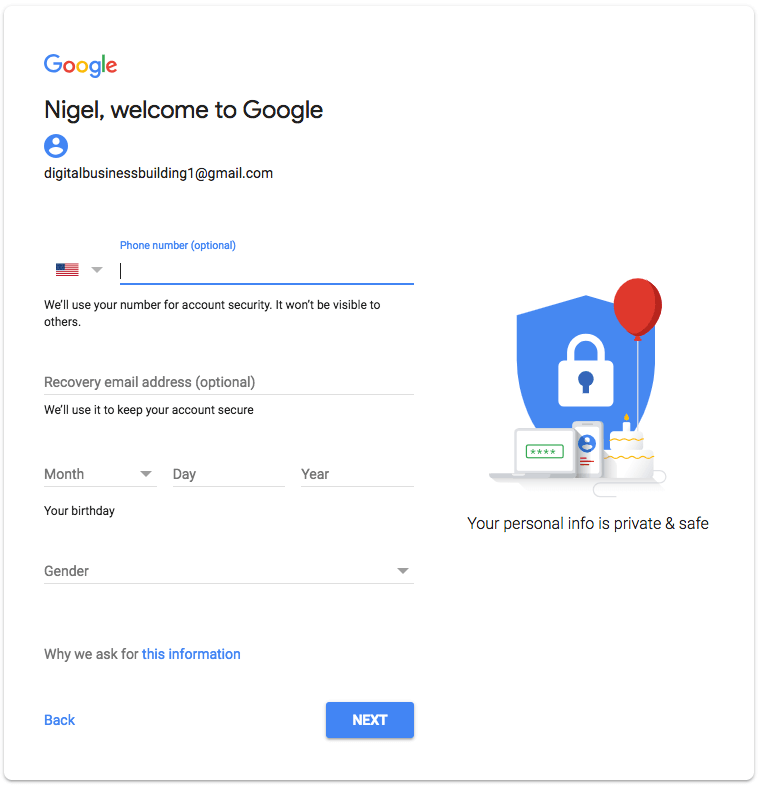
Here you have the option to enter your phone number again along with an email address in case you forget your login details. Finally, enter your birthdate and your gender.
You now have your shiny new Google account. With this setup, you can create a YouTube channel.
You can also set up a Google Adwords account, which gives you access to Google Keyword Planner and other useful tools. Just be aware that Google loves to take your money, so don’t set up an Adwords budget unless you plan to run ads.
How To Create a YouTube Channel If You Already Have a Google Account
If you already have a Google account, you can skip the above step and go ahead and create your YouTube Channel.
How To Set up a YouTube Channel
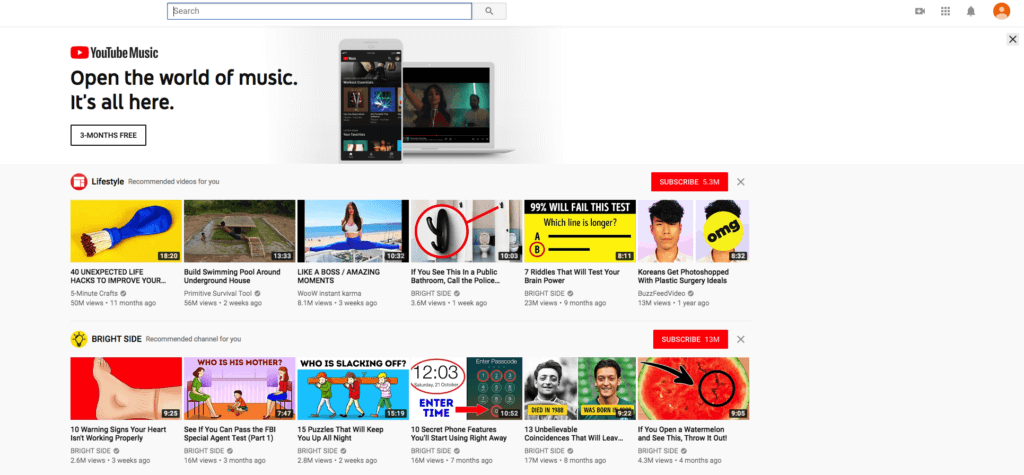
Go to YouTube.com click on the colored circular icon in the upper right-hand corner. If you have multiple Google accounts, be sure to select the one you want to be associated with the YouTube channel.
This will produce the drop-down menu shown below.
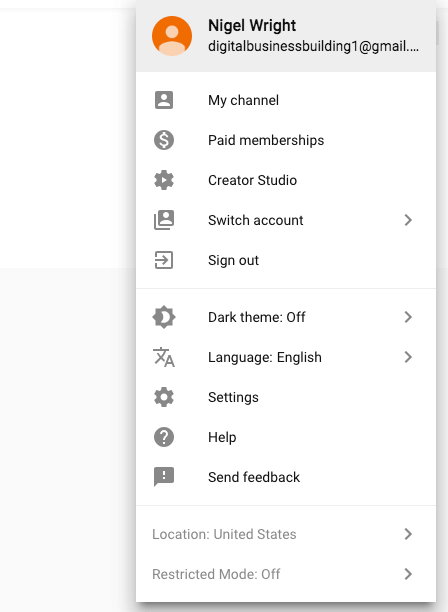
I should also re-affirm that these instructions apply to the YouTube desktop site. If you use the mobile or iPad app, things will look slightly different.
Next, you should click on “My Channel” and this form will appear.
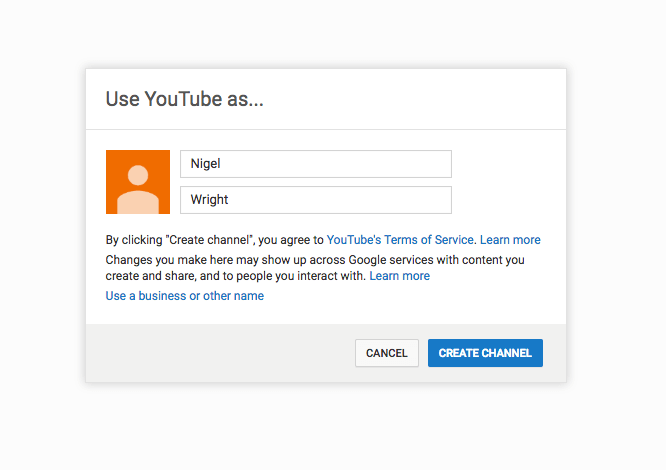 I recommend you click on the “Use business or other name” to create a Brand Account.
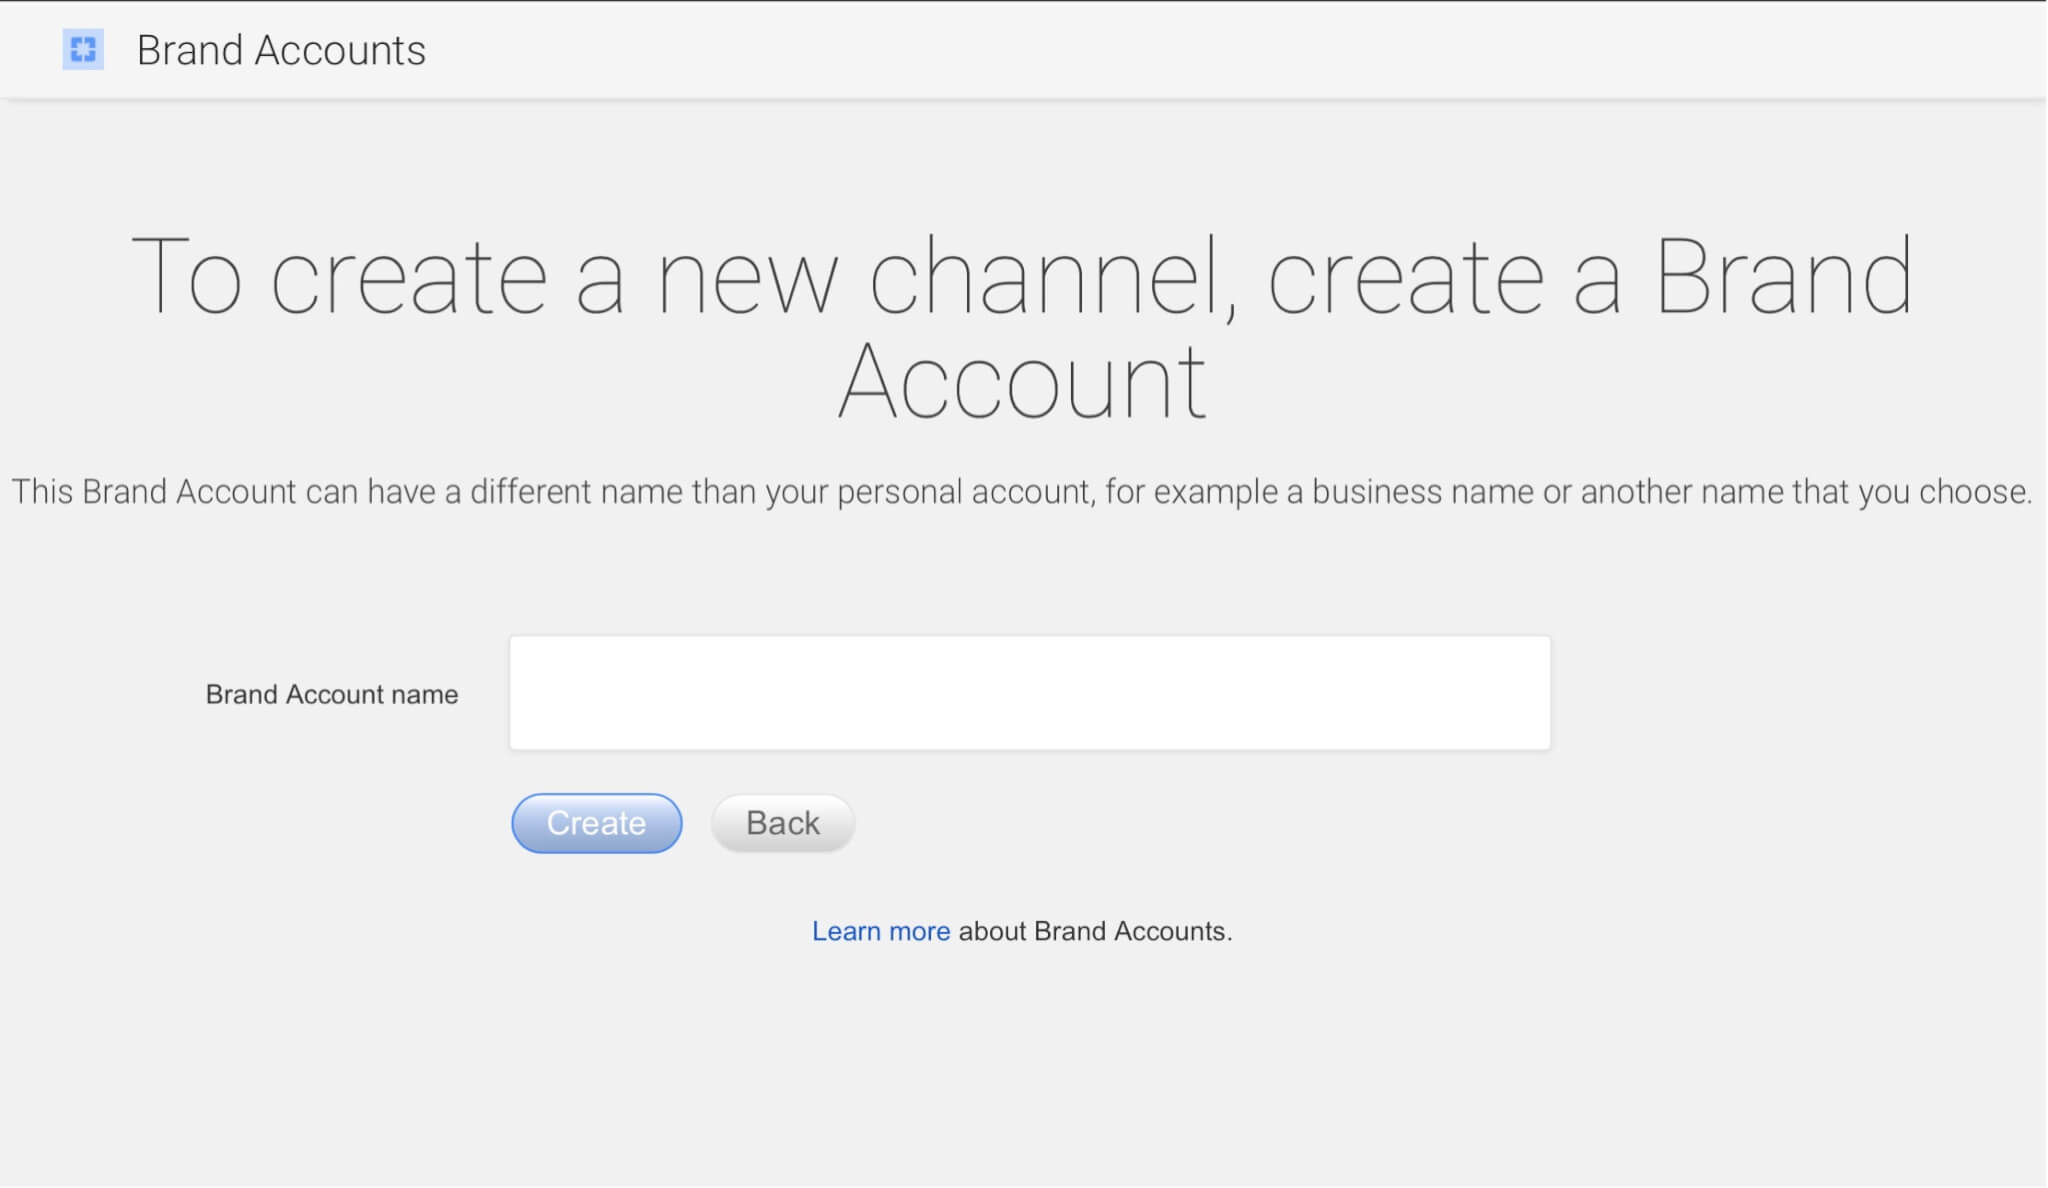
Enter your brand name and click on the “create” button to move to the next page. Choose a name. It doesn’t have to be the same name that you used to create your Google account. However, it should reflect your business or personal brand.
You will then be taken to the dashboard for your channel. Congratulations, you have created your YouTube channel, now, it’s time to start customizing it.
How To Customize Your YouTube Channel
This is where you can customize the look and also the description of your YouTube Channel. Let’s start with the look or what is often referred to as “YouTube Channel Art”.
How to Create YouTube Channel Art
YouTube channel art is effectively a channel banner that displays at the top of your channel page. Think of it as YouTube’s version of the Facebook cover page or the banner on the homepage of your website.
Channel art is your opportunity to get the attention of your audience and convey your brand visually. You can also present a bit of your personality and style.
Here are some examples:
Vlogger and drone destroyer, Casey Neistat keeps it simple:

Casey is pretty well known, so doesn’t need to explain much, but the picture holding the camera indicates that he is a video guy. The image in the bottom left corner is his YouTube Profile Picture. More on that later.
Steve Dotto’s Tech Channel has nice graphics and a couple of pictures of Steve which give the viewer a feel for his personality.
The slogan shows that the channel helps people understand technology. Steve has also added his website address, which is a smart move if you want to direct people to your site or blog.

Marketing Expert and Celebrity, Gary Vaynerchuk has evolved his brand over the years. Here is his latest banner.
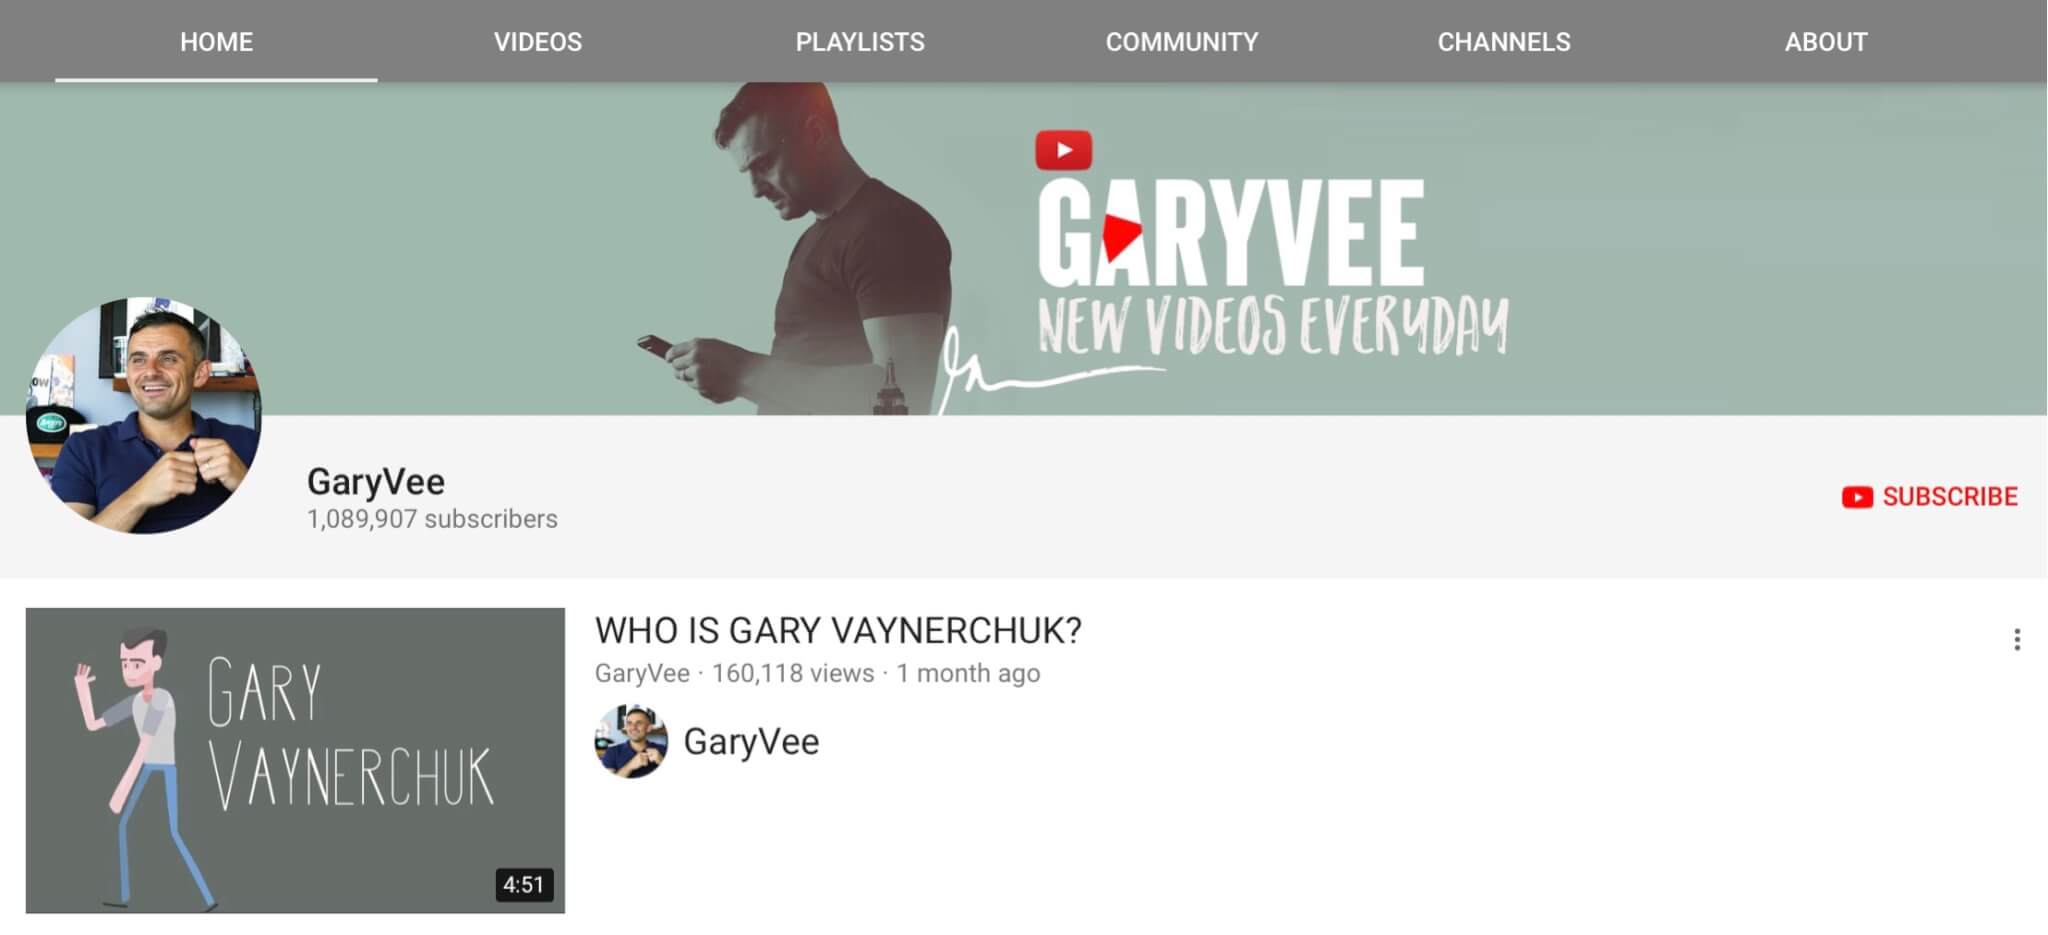
The statement “New Videos Everyday” encourages the visitor to subscribe to see Gary’s daily Vlog.
I also included the pinned video “Who Is Gary Vaynerchuck”. This gives the visitor a chance to learn a bit about Gary to help them decide if they want to subscribe to his YouTube channel.
Finding a YouTube Banner Template
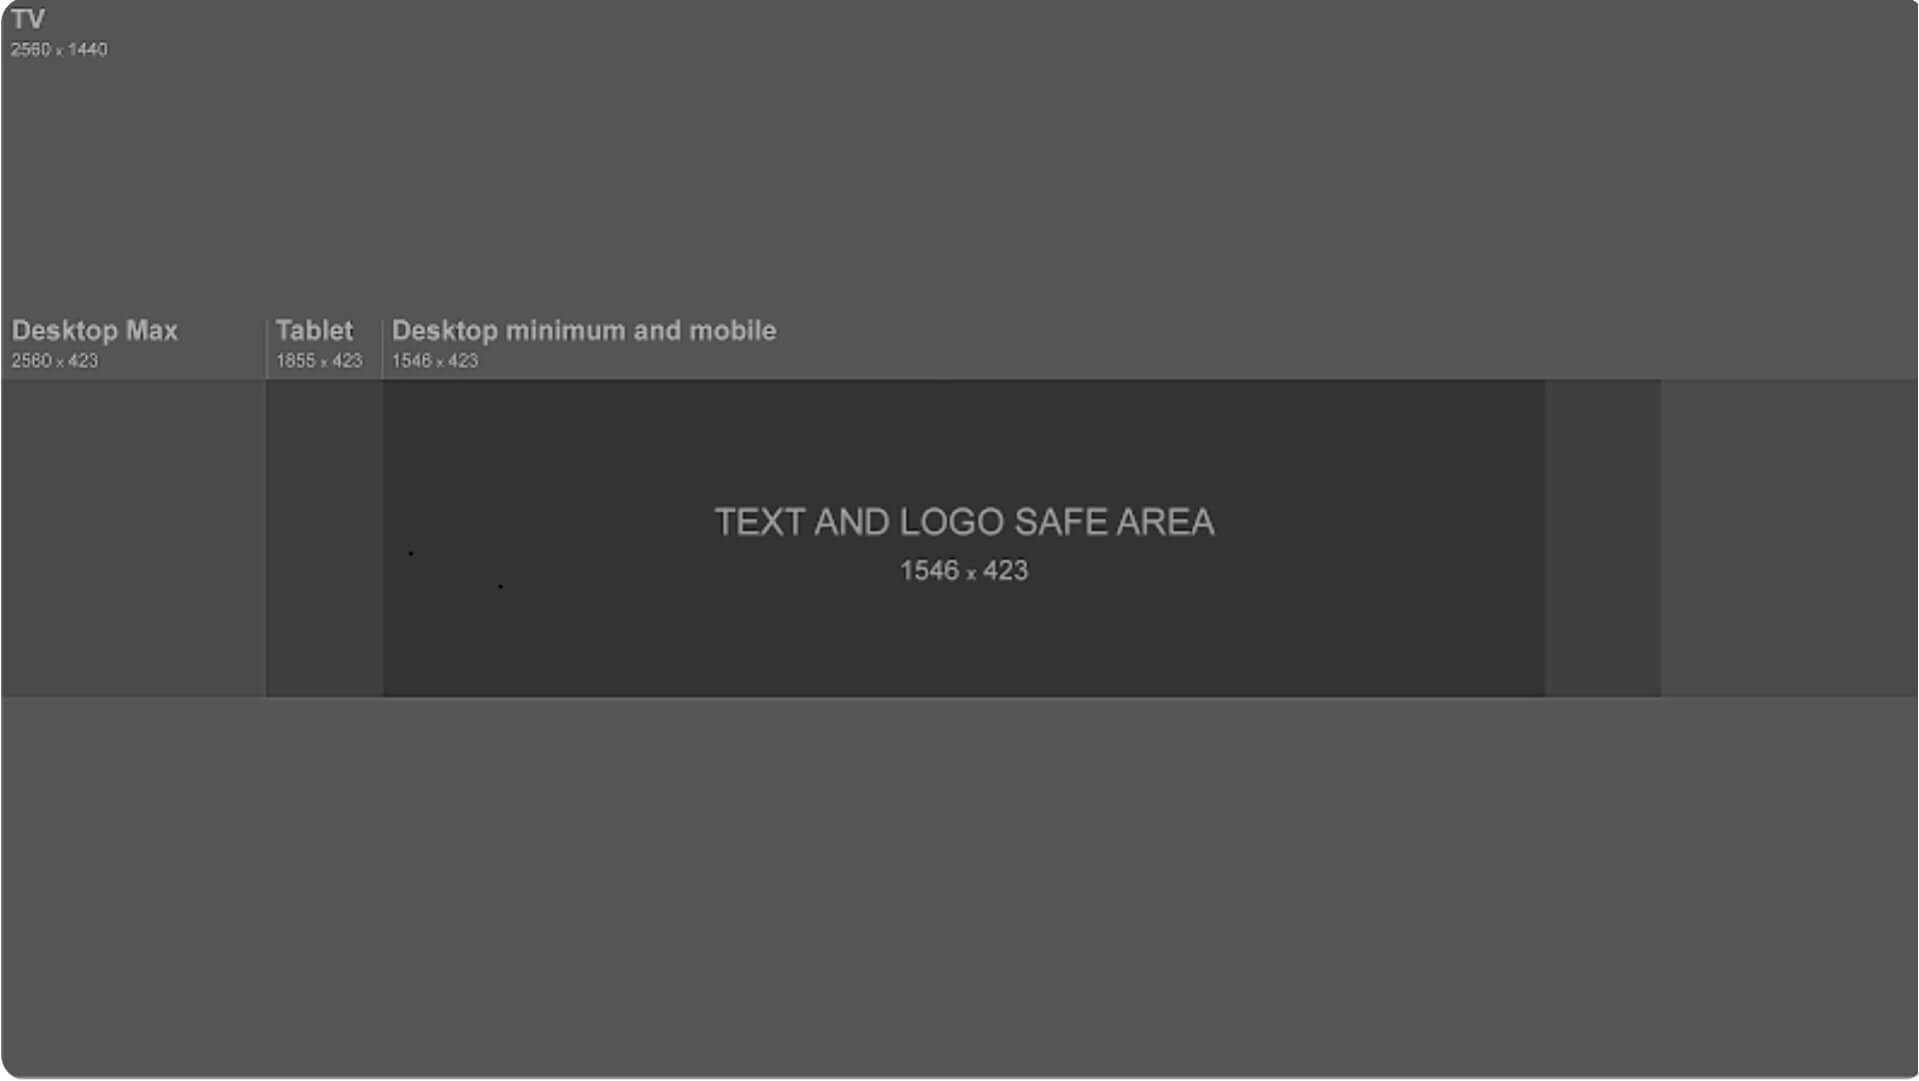
There is an optimal size for a YouTube Banner, 2560 x 1440 pixels, but note that this is for display on a TV screen.
As most of the viewers of your channel are probably using different platforms like desktop or mobile, you need to create a responsive banner that works on all platforms. I found this part particularly frustrating. My first attempt looked great on a TV screen, but most of it was missing from the other platforms.
Luckily, Google has this image that represents the best dimension for each viewing:
YouTube also makes these additional sizing recommendations:
- Minimum dimension for upload: 2048 x 1152 px.
- Minimum safe area for text and logos to be visible on mobile: 1546 x 423 px. Larger images may get cropped on certain views or devices.
- Maximum width: 2560 x 423 px. This means that the ‘safe area’ is always visible regardless of screen size. The areas to each side of the channel art are visible or cropped depending on browser size.
- File size: 4 MB or smaller.
The text and logo safe area is the 1546 x 423-pixel space at the center of the YouTube channel art banner template. You should make sure all your text and important other detail such as branding, taglines, and key images are within this area.
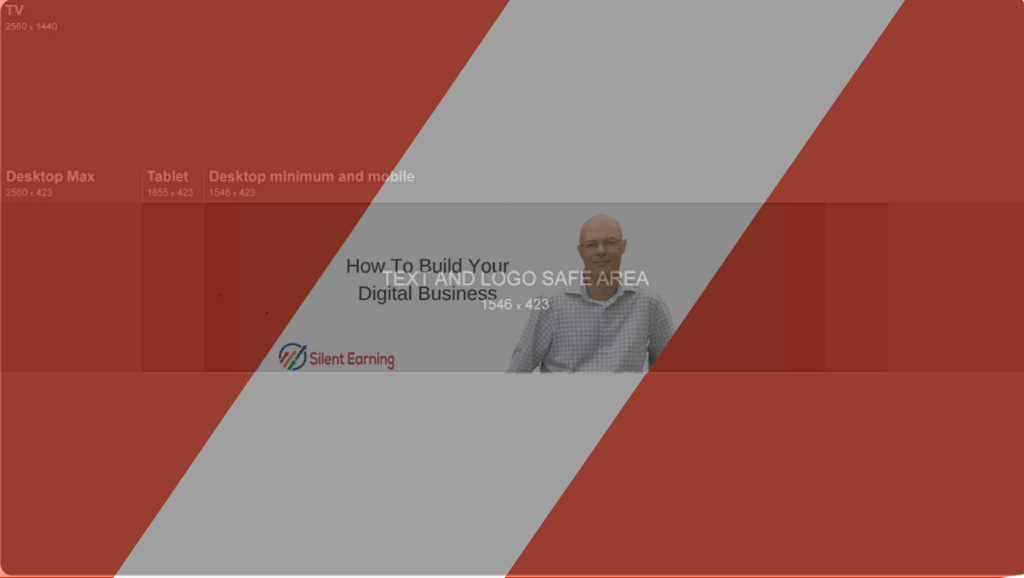
This is how my YouTube Channel Banner finally looked against the YouTube Banner Template, showing that the important information will be visible on all platforms:
I use Canva to create all my web graphics. It has its own YouTube Banner Template, to help you get the dimensions right. Here is a link to it: Canva YouTube Banner Template
Tip: Take a screenshot of the YouTube Banner Template and upload it to Canva. Them overlay it onto your YouTube banner as you see in the photo above and stretch it out to 2560 x 1440 pixels.
Then upload your completed Channel Art Banner and add it to the same Canva Design. Bring the YouTube Template to the front and make it translucent. You can now see whether the information in your banner is going to fit on all platforms. If it isn’t you can either resize it, crop it or remake it in Canva.
If you want some inspiration for your banner design, check out this article from Hubspot, “7 of the coolest YouTube banners we’ve ever seen.”
How to add your Channel Icon to your YourTube Channel Art
Each channel also has space for a profile icon. You will remember this from the banner images I shared earlier in the article. This is a circular image that starts life as a colored circle with a letter in the middle which matches the name of your channel.
You have the option to change this and typically you would upload a photo of yourself. If you look back to the banner examples from earlier in the article you will see what I mean.
Your channel icon should be 800 x 800 pixels and one of the following formats: JPG, GIF, BMP or PNG file (no animated GIFs).
To update your channel icon, you should select “my channel”, which takes you to your channel homepage.
Hover over your current channel icon (the circle with the letter in the middle) until you see the camera icon appear. Click on that icon and you’ll be able to edit the icon and upload a new photo or logo.
Your YouTube Channel Description
Next, you’ll want to fill out your channel description. This is the first option you see after you have created a channel.
The description you put here will appear in more than one place on your channel. It’s also indexed by search engines and can be featured on YouTube in suggested channel categories, so it is important to optimize your channel description as much as possible.
A good tactic is to include some relevant, high search volume keywords within the opening lines of your description. You should take the time to accurately describe your brand and what viewers can expect to see on your channel.
This is also a great place to add links to your website and your social media networks.
Note, that you can also add links to your YouTube Channel Art. These are displayed in the bottom right corner of your YouTube Channel Banner like you see on this banner for Buffer.com:

How to Add Links to YouTube Channel Art
The first step is to go to your channel homepage and click on “Customize Channel”. This will take you to a page where you can edit your channel art.
Before you can add links, you need to check one thing. Click on the cog icon next to the red “Subscribers” bar, under the banner. This will open up the following window. Toggle the item I have highlighted in red, to enable the “customize the layout of your channel”.
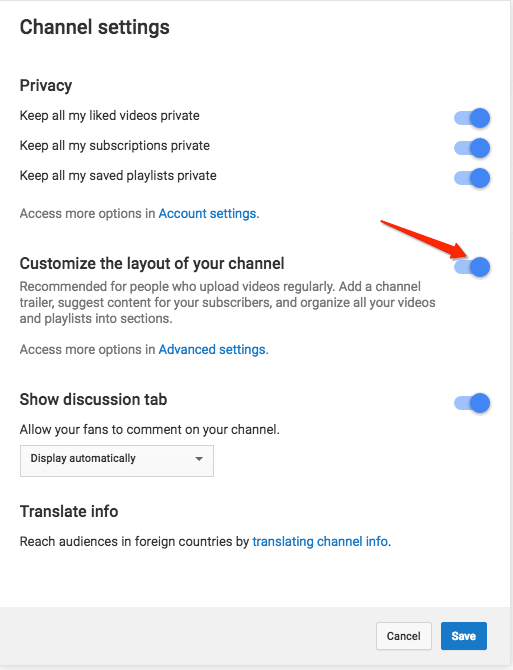
You can now return to the “Customize Channel” page and click on the pencil icon in the top left corner “Edit Links” as shown below.

This will take you to the “About” section of your channel where you can add links to things like your website, blog or social media accounts. You can also choose which are displayed on your channel art.
What Content To Post
Since you’re creating a YouTube channel for your own business, you should already have enough video material available to upload. However, it also needs to be complementary to your business.
If you are promoting a software product, you may want a series of tutorials on how to use the product. Likewise, if you are selling a training course, a sample of your course material or your training would be helpful.
You should also create content that’s aimed at your target demographic. The more that you cater to your target market, the more likely they will want to look into your product or services.
If you need some more ideas, check out my article that lists some of the most viewed videos in the online marketing space:
What Videos Get The Most Views On YouTube
I recommend you check out this YouTube video from Sunny Lenarduzzi:
21 of the BEST YouTube video ideas
Ways to Make Money From Your YouTube Channel
If you want to know different ways to make money from your YouTube channel, check out my article:
In order to make money from your YouTube channel, you need to set up one or more YouTube Marketing Funnels. If you want to learn more about this, please download my free guide:

